.png)
Though I have been intrigued by XR and its different flavors for about 2 years now, only recently I buckled down and commenced my journey in learning this technology. First I started with an introductory course on Augmented Reality and ARCore from Coursera. Then I moved on to learning the Unity platform. After creating my third very basic AR project in Unity, I realized that each new project needed specific configurations to run as expected. This is the scope and end goal of this article – preparing a Unity project for AR development that runs on an ARCore compatible device. This article is for anyone who is just getting started learning the Unity interface to develop AR applications. Without further ado, let's get started. Create a new project using the Unity Hub. Ensure the template selected is 3D. I am working with the Unity version 2020.3.4. [Interface changes drastically sometimes so this is important]

With the new project loaded, you'll see several panels to be used. Some of these include Scene, Hierarchy, Inspector, and Project. Next, we will ensure the “Auto Generate” option is checked for Lighting. To do this, go to Window on the menu bar, hover over the “Rendering” option then click “Lighting”. The Lighting panel should open. You may see that the “Auto Generate” check box may be disabled. If it is, click the “New Lighting Settings” button to create a new Lighting setting then select the Auto Generate check box. Close when finished.
Next, we add the packages needed to support AR development in Unity. Select Window again from the menu bar, then select Package Manager. The Package Manager panel depicts packages currently in the project and also packages available in the Unity Registry. Ensure the Unity Registry is selected then search for and install the following:
- AR Foundation
- ARCore XR Plugin

Now we need to prepare the scene. First, we add the following game objects to the scene:
- AR Session Origin (used to convert the session space to Unity world space)
- AR Session (controls the lifecycle of an AR experience, enabling or disabling AR on the target platform)
If you do not see the Hierarchy panel, go to Window on the menu bar, followed by Panels and select Hierarchy. To add these two game objects, right-click within the Hierarchy panel, select XR and you will see those two elements to be added.
The AR Session Origin element has an AR camera and thus the default main camera will not be needed. Delete it now. Your scene is ready.
Before we can start building and testing on our Android device, some configuration settings need to be altered. Select File on the menu bar and click Build Settings. Ensure that the current project scene is added to the “Scenes in Build” section by clicking the “Add Open Scenes” button.

Given that it is a new project, the platform selected may be “PC, Mac & Linux Standalone”. We are working on an Android device, so select Android and click the “Switch Platform” button.
There are a few more settings to change so click the “Player Settings” button. With the Project Settings panel open, the Player option should be selected by default.
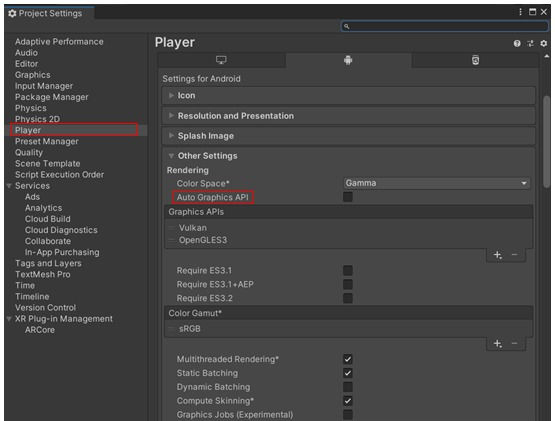
Complete the following:
- Uncheck the “Auto Graphics API” checkbox. This should automatically remove the “Vulkan” option under the Graphics APIs section
- Scroll down and uncheck the “Multithreading Rendering*” checkbox
- Scroll down and change the “Minimum API Level” to at least API level 25
Lastly, select “XR Plug-In Management” option. Ensure that the “ARCore” checkbox is checked.

And that’s all folks! Connect your ARCore compatible Android device to your system and click the “Build And Run” button. Enter a name and a save location for the apk file. After building, you should be greeted with a prompt on your Android device to allow access to the camera. With the camera activated, you are good to go to start building your AR application.
Comments